Rhythm Masters Improvisation

Rhythm Masters / Improvisation

"We Will Rock You"

Project Title:  “We Will Rock You”   By – Queen

                A “count offs” audio file will not be needed in this lesson.  The student(s) will improvise on the “A” melody and the full ensemble plays on the “B”, so “cues” are not necessary.  Also, for some reason (I do not know how), I could write the i-Pad section in the key of “E” and the traditional keyboard in “Eb”.  They both sound correct, so it works out quite nicely for instructional purposes.  Either way, I start out with the bass part (being the easiest).  The next image is to practice the rhythm with, using kind of a “paper” keyboard or i-Pad.  The counts “1, 2, 3, & 4” being quarter notes and “5, &” being two 8th notes.  Note, on a traditional keyboard you will start on the “Gb” and simply play upward each consecutive black key.  I use this image to help students get used to identifying the “twins” and “triplets” (the two black key groupings) on a regular keyboard, and later use this knowledge to help them learn how to identify their “white” keys, prior to memorization.

"We Will Rock You" Bass Part i-Pad (4 key grey keyboard)

"We Will Rock You" Main Melody "B" Part 2 i-Pad (6 key grey keyboard)

"We Will Rock You" Main Melody "A" i-Pad (4 key grey keyboard)

Setting Up "smart piano" (with smart bass)

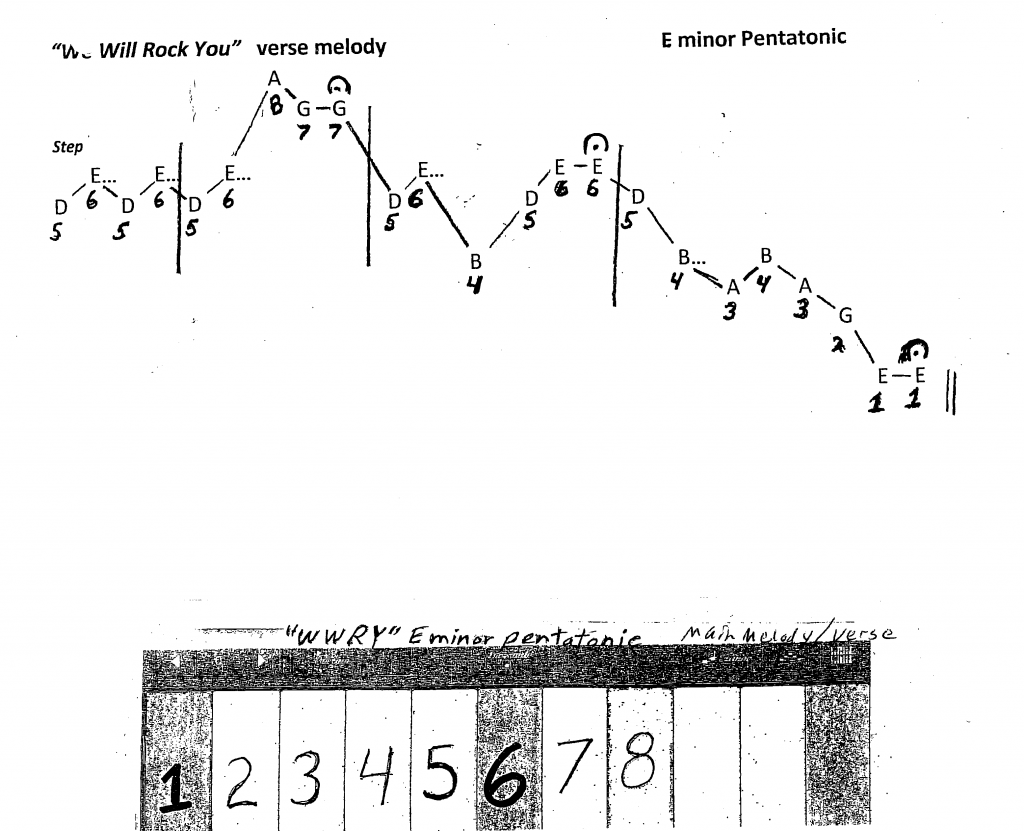
Setting Up Smart Piano (with Smart Bass)

                The tricky part is pre-setting your “keypad” to match the settings displayed on the website or your “cheat sheet”. Once the chords are set up in an efficient and “easy to perform” format, the rest is easy.

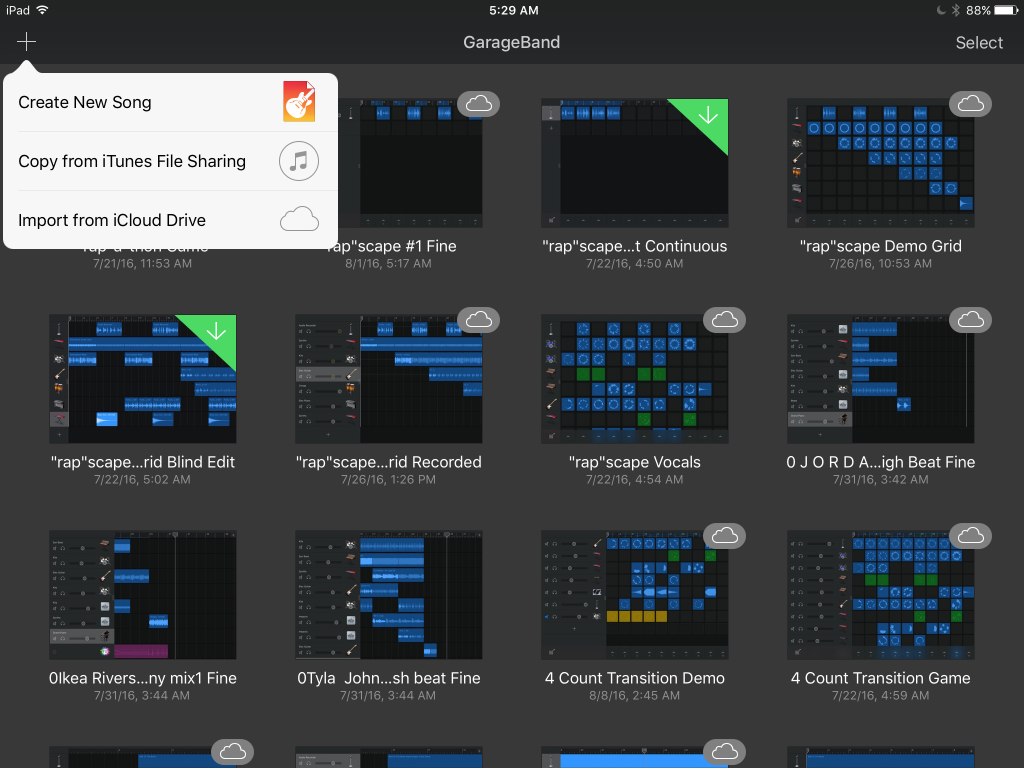
1.) Create new song, or open a previously created project.

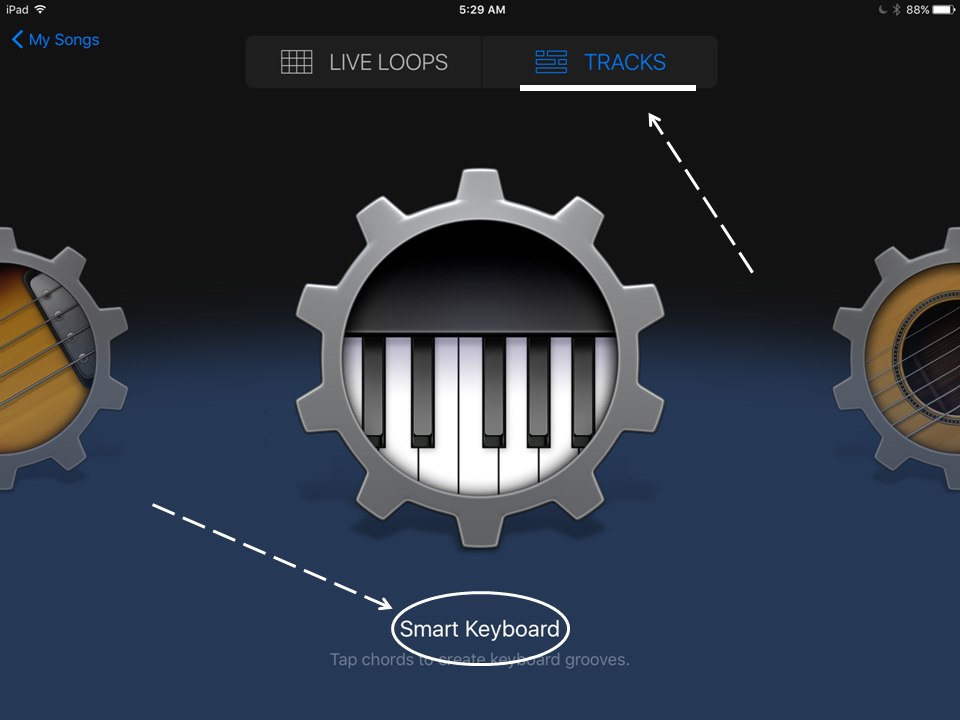
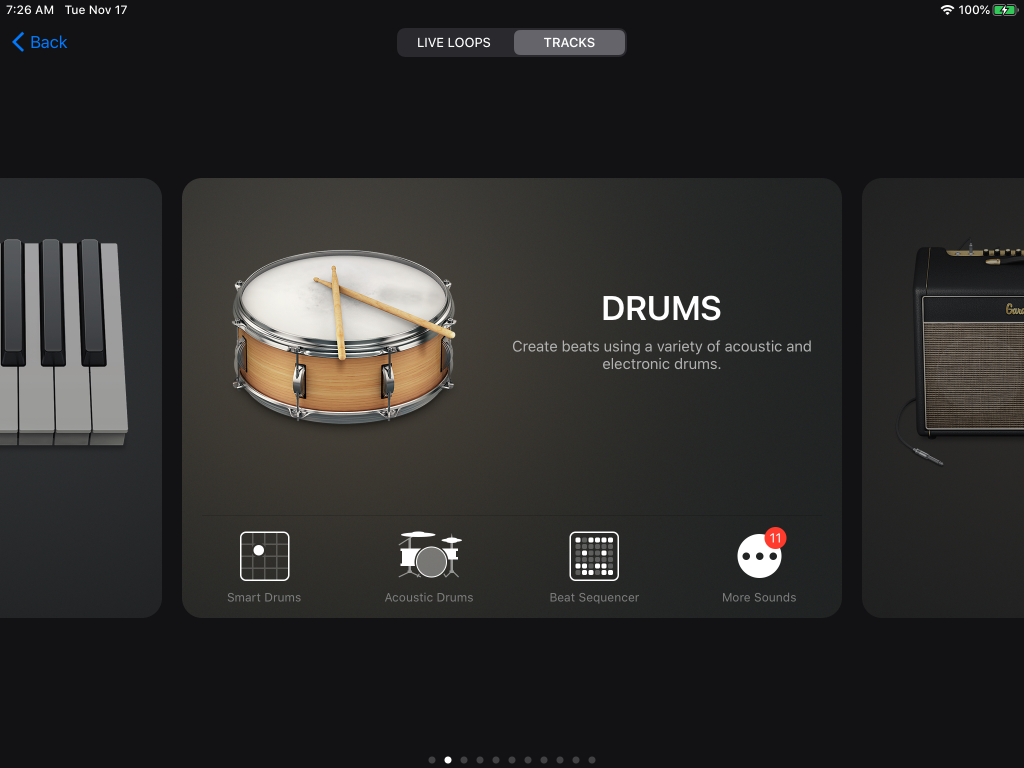
2.) Go to the “instrument selection window” and scroll until you find “Smart Keyboard”. That is the icon with the piano keys inside a “gear”.  Be sure you’re in “Tracks” NOT! “Live Loops”.

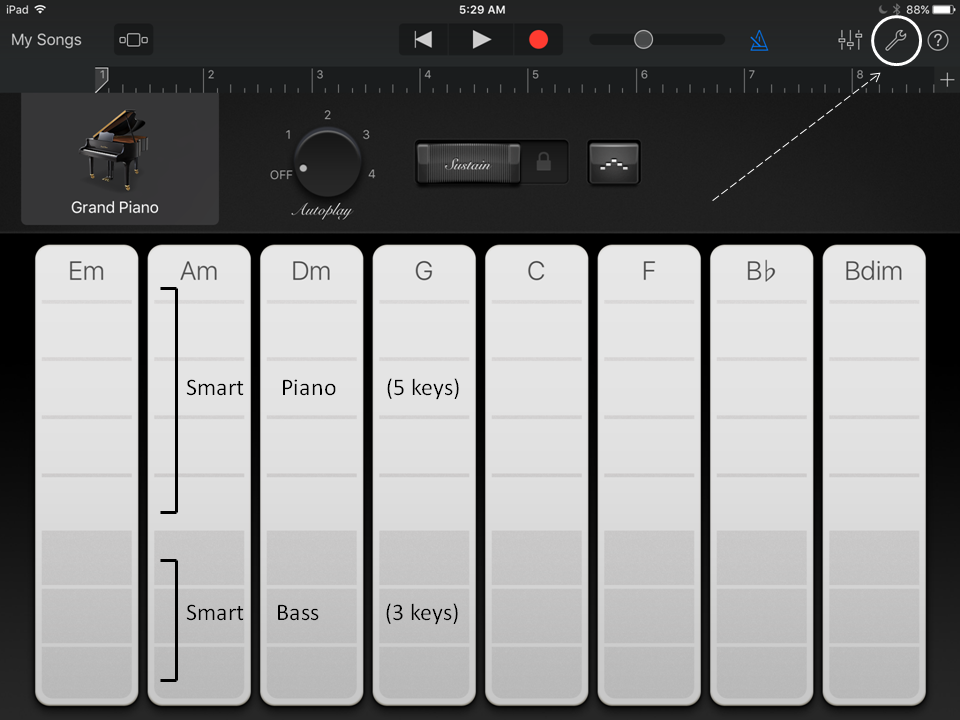
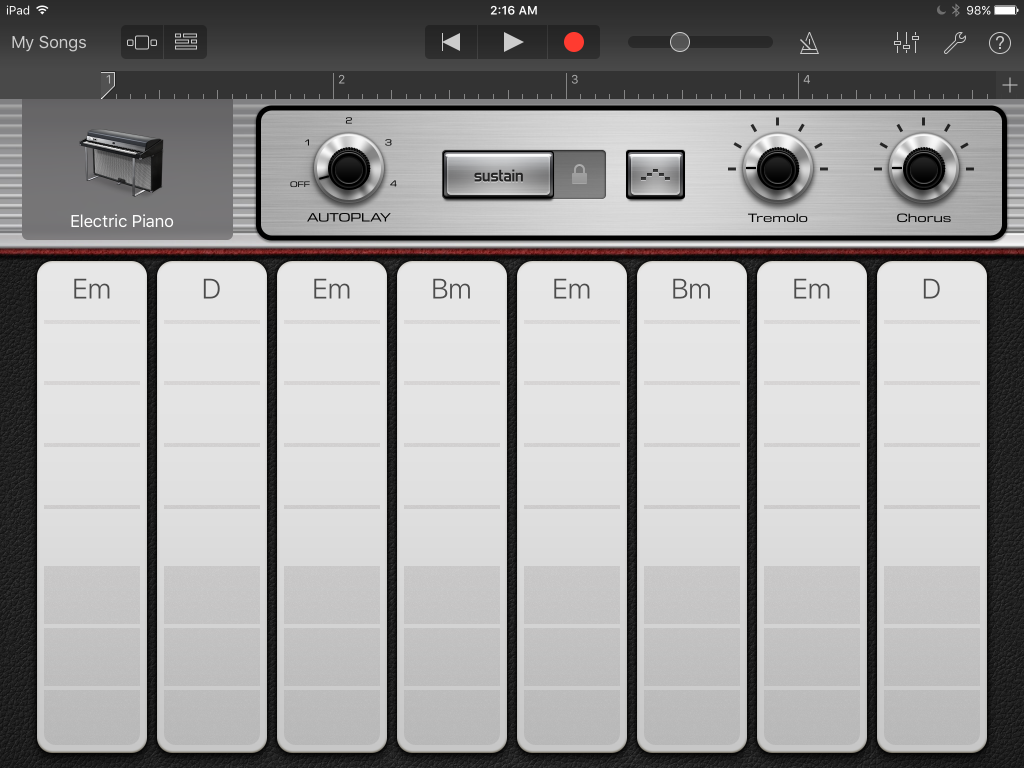
3.) Tapping the piano/gear icon, you will now be in your “Smart Piano” screen.  The five light grey keys on the top of each column are different piano inversions of the particular chord labeled at the top of the column. The bottom three darker grey keys, are the “Smart Bass” notes available within the “Smart Piano” screen.

To change the chord at the top of each column to match the “map” settings of the “Smart Piano” keyboard map for this particular song, follow the procedures below:

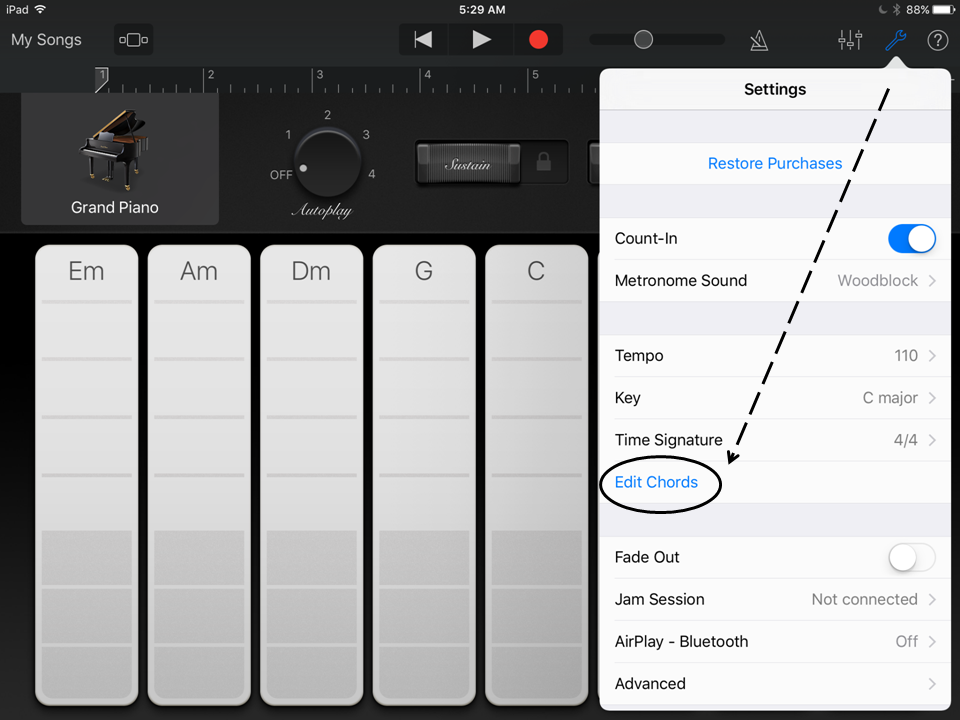
4.) Tap the “Wrench” icon at the top right corner of your screen (just to the left of the circled “?”).

5.) The “Settings” window will then appear. In the “middle/bottom” of that window you will see “Edit Chords” highlighted in blue. Tap it.  The next entry is more of an “technical explanation” than a step in the process of setting up “Smart Piano”.  Students should just skip it.

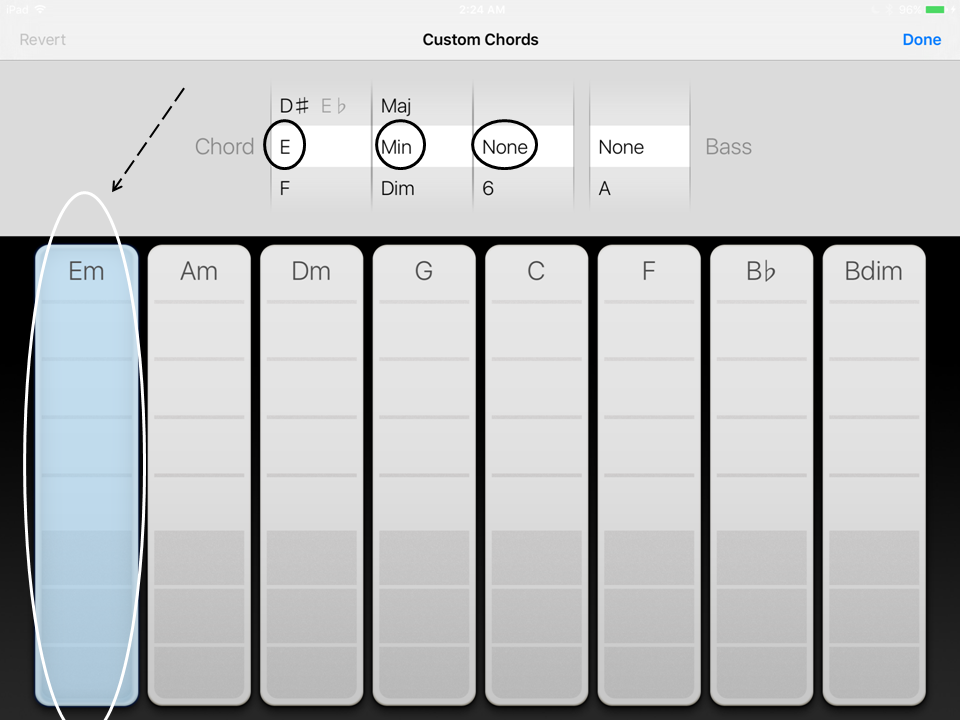
6.) At the “top/center” of your new screen you will see “Custom Chords”.  Just below “Custom Chords” you will see four “Wheel of Fortune” (what I refer to as) “vertical spinners”.  The first “spinner” sets one of the 12 notes available in the chromatic scale. The second “spinner” gives you the choice of “chord type”. The third “spinner” is for “chord modifications” or “add-ons”. Finally the fourth “spinner” (separate from the first three) is the bass spinner separately controlling the bottom three keys.  This is if you want a bass note other than the root or fifth of the chord listed at the top of the column. You’ll notice on the top key you’ll see the chord labeled, a “/”, and then the separately chosen bass note.  I am not sure why you would want it, but it is there if you do.  The top choice in each spinner is “None”. The “bass spinner” defaults to the “None” setting, which aligns the root and fifth to match the chord indicated at the top of the column.  If you would like to eliminate a column “altogether”, set all “spinner” settings on “None”.

Continuing on with the “step-by-step” set up procedures:  Touch anywhere on the first column and you will see all the keys in that column turn “blue”. That means it is active, and whatever “spinner” positions you pre-set, will appear as the new chord settings for that column.  Start at the left column and work your way to the right matching the “We Will Rock You” settings that you see on the website or your “cheat sheet”.  At first, your teacher may have to help you, but after a short while it is simply a matter of “matching pictures”.

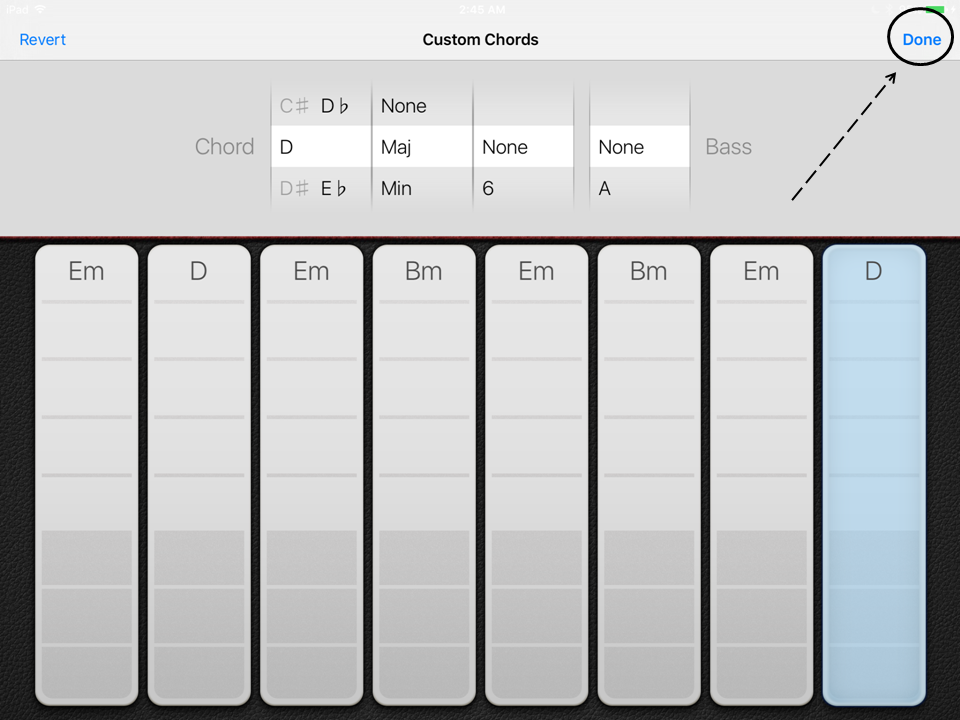
7.) Once you have finished resetting all of the “spinners” (as needed) at the top of the page, tap the word “Done” at the top right corner of the “Custom Chords” screen.

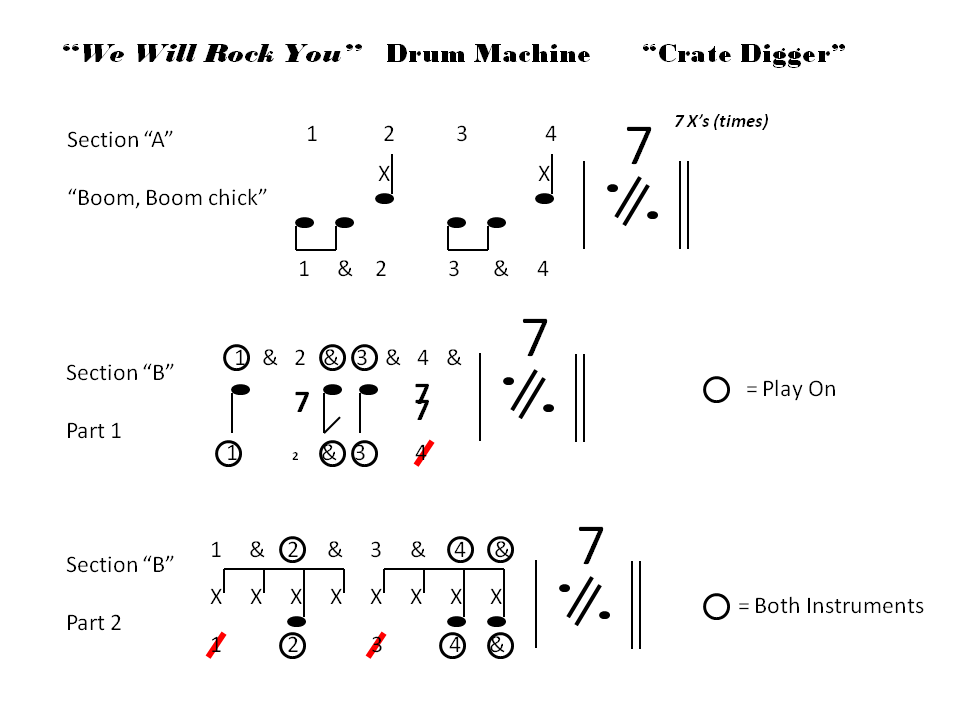
8.) You are now ready to play the basic “Smart Piano” (and “Smart Bass”) part as written for this particular arrangement.  Simply follow the map (along with any related rhythms if indicated) as given to you on the website or your “cheat sheet”.

1.)

2.)

3.)

4.)

5. )

6.)

7.)

8.)

“We Will Rock You” Acoustic Drum Kits and Drum Machines:

Acoustic Drum Kits:  Select “Drums” in your “Instrument Selection” screen.  Then, choose “Acoustic Drums” the second from the left of four choices at the bottom.  When a drum kit (drum set) appears, there will be a display rectangle, just below the “Play” button.  Inside the display you will see “So Cal” which is the default drum kit you will presently see being displayed.  Click there and you will be given numerous different “drum kit” set ups you can choose from.

Drum Machines:  Select “Drums” in your “Instrument Selection” screen.  Once again, choose “Acoustic Drums” the second from the left of four choices at the bottom.  Also “click” on the rectangle display that reads “So Cal”.  This time however, on the left side of the screen that appears, you will see three choices: “Acoustic”, “Electronic”, and “Percussion”.  Select “Electronic”.  Now you will see a window listing a variety of “Drum Machine” combinations to choose from.  For our purposes with “We Will Rock You”, scroll down a little until you see “Crate Digger” and select it.  That is the screen shot you will see in this presentation. 

                With a “Drum Machine”, you have a larger variety of instruments to choose from.  Such as; three different bass drum sounds, maracas, bongos, and “hand claps” etc…   To add even more variety, you can switch out snare, cymbal, and bass drum sounds between sections “A” and “B” of the song.  You can also combine sounds by playing more than one instrument at a time with your fingers.  For example, you can combine sounds such as one of the snares with “hand claps” (or even a “choke” cymbal) when playing the “back beat” on counts 2 and 4.  As you are working with the “Crate Digger” setting, play around with different sounds and instrument combinations, to give your drum machine a completely different and unique “feeling” or “texture” to your drum accompaniment for “We Will Rock You”.

Three Different Drum Sheets I have used with this Lesson:

Optional: "We Will Rock You" For Traditional Keyboards:

Keyboard Ensemble Score:

Traditional Keyboard Maps Combined:

"We Will Rock You" Main Melody "A" Traditional Keyboard Maps:

"We Will Rock You" Standard Notation Combined:

"We Will Rock You" All Standard Notation Parts in Sequence:

"We Will Rock You" Bucket Percussion:

"We Will Rock You" Original Audio File Resource:

"We Will Rock You" Loops for Solos (in the key of 'Eb' minor):