Improvisation Assignment #10
The 3 Ring Color Coded “Blues Clock”, and How to Use It:
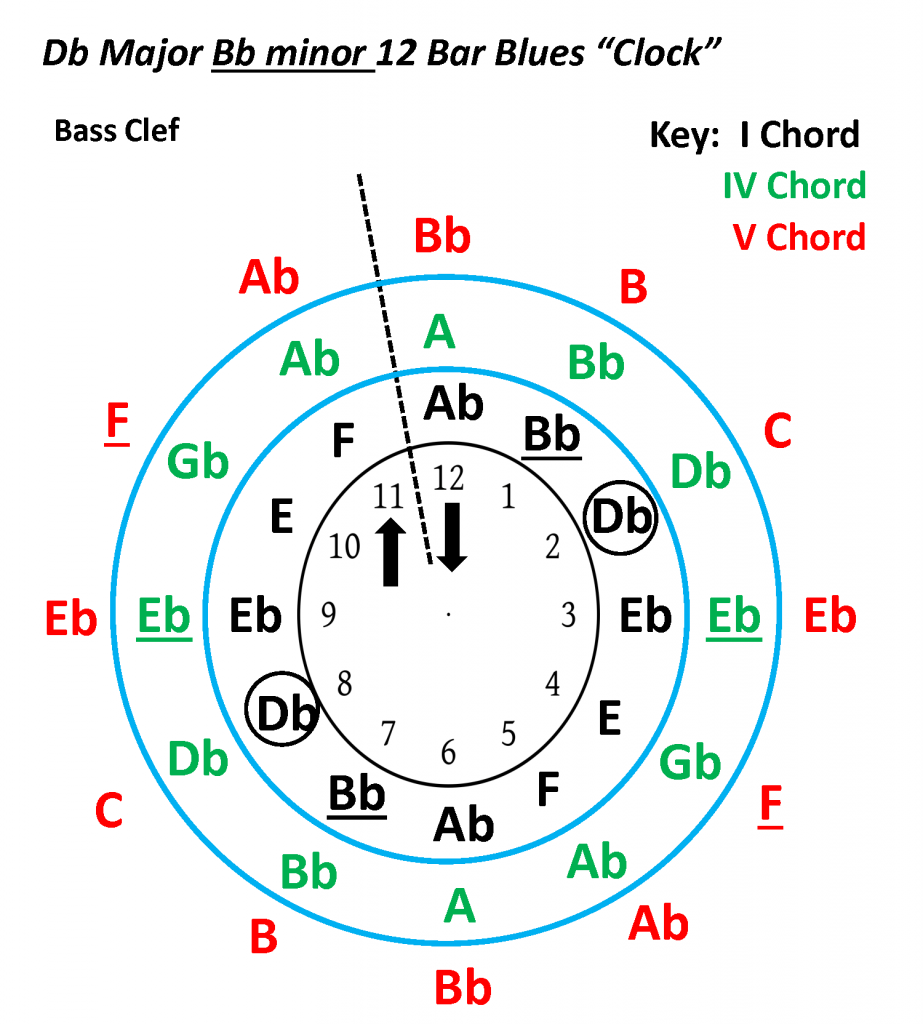
The “Three Ring Blues Clock” is designed to help students transition back and forth between the different “blues scales” used by the I, IV, & V chords. To make things even easier, the chords (and their “blues scales”) are color coded to help our young musicians visually transition between them. The code is; black for the I chord, green for the IV, and red for the V chord. While traveling clockwise or counter clockwise around the clock, let’s say starting with the I chord’s “blues scale”, when you switch to the IV or V chord, move to the note straight across (the same hour on the clock), or slightly forward or backward onto the new “ring” or color you are next going to improvising in. What I mean by “slightly” is “+” or “-“ one, or at most, maybe two hours on your clock.
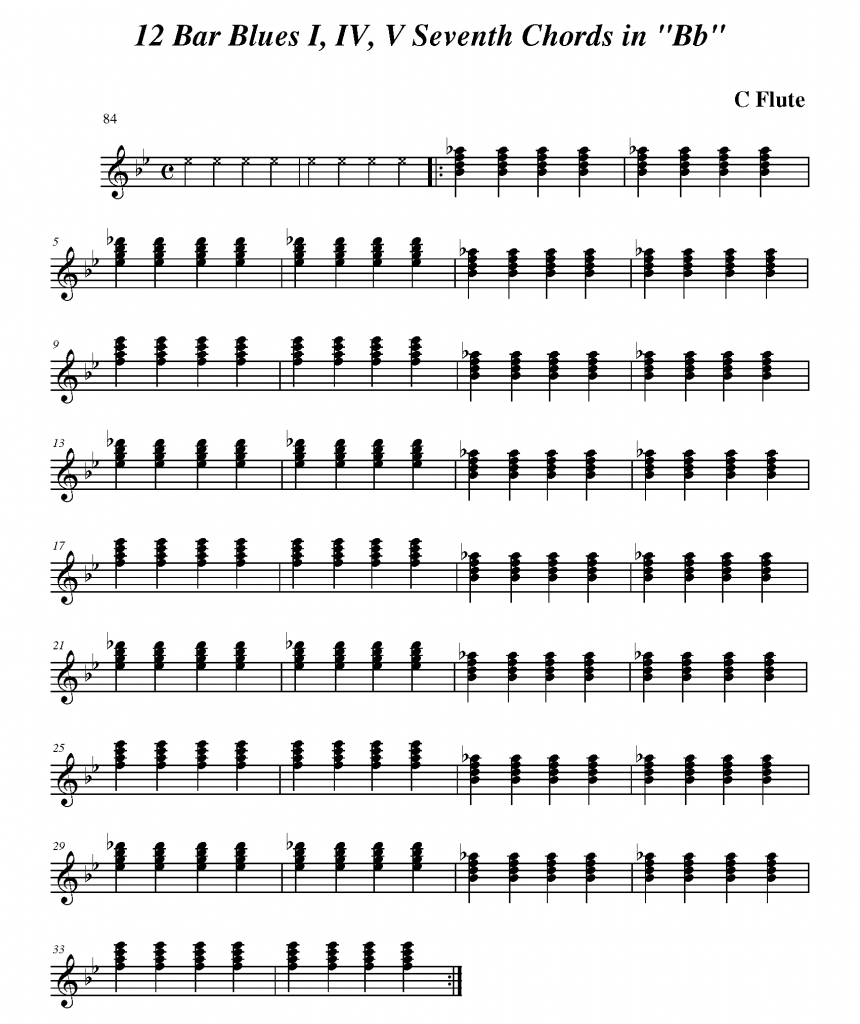
Before doing any improvisation assignments using the “three ring clock”, practice using the “12 Bar Blues I, IV, & V Seventh Chords in Bb” sheet. It is designed to help you transition back and forth from the three different chords, every 8 counts. The pattern is always: I, to IV, to I, to V, and then back to I. Obviously these transitions are pretty flexible, and there are several choices that will sound pleasing to the listener’s “ear”. What you do want to avoid though, are any large “skips”. The closer the transitioning notes are to each other, the smoother the chord changes will come across. A soloist can improvise along with the included MP3, or if there is more than one player, take turns soloing as the other(s) play the quarter note chords for support. If there are more than two students participating, divide the four notes of each chord up between the additional players.
If you are having difficulty visualizing what I am talking about, watch the attached video. I use a straw (as a pointer) to model the transitioning motion I am talking about on a “Blues Clock”. Your transitions will be a little rough at first, until you get used to using the clock in this way. Eventually though, this tool will help you create “seamless” chord transitions, without even having to think about them.
You can also use the “Bb 12 Bar Blues Progression Notation” sheet in a similar way. With this tool you “slide” across the three different chords on your instrument’s staff, transitioning up or down (one, or at most two) staff lines or spaces, to the new “blues scale” you are shifting too. Note: The “whole notes” designate the basic blues scale (starting with the tonic) that is in the most comfortable range for your instrument. The “filled in” note heads (quarter notes without stems) are extensions up and/or down from that chords “blues scale”, which are within a reasonable “reach” for most students. Of course, when you are improvising, only go as high as you feel comfortable with. Avoid playing too low in that the sound gets “muddy” and the quality of your tone is not as nice. The less experienced soloist will probably find the “clock” a little easier. However, play around with both tools and decide for yourself, which works best for you.
Click below to access all “3 Ring Blues Clocks”:
Scale and Rhythm Exercise E : Concert "G"
Color Coded 12 Bar Blues Chord Progression Map: